Mushroom Forest: Collective Art Project for 2016!

Dear Everyone: come frolic with us in the MUSHROOM FOREST!

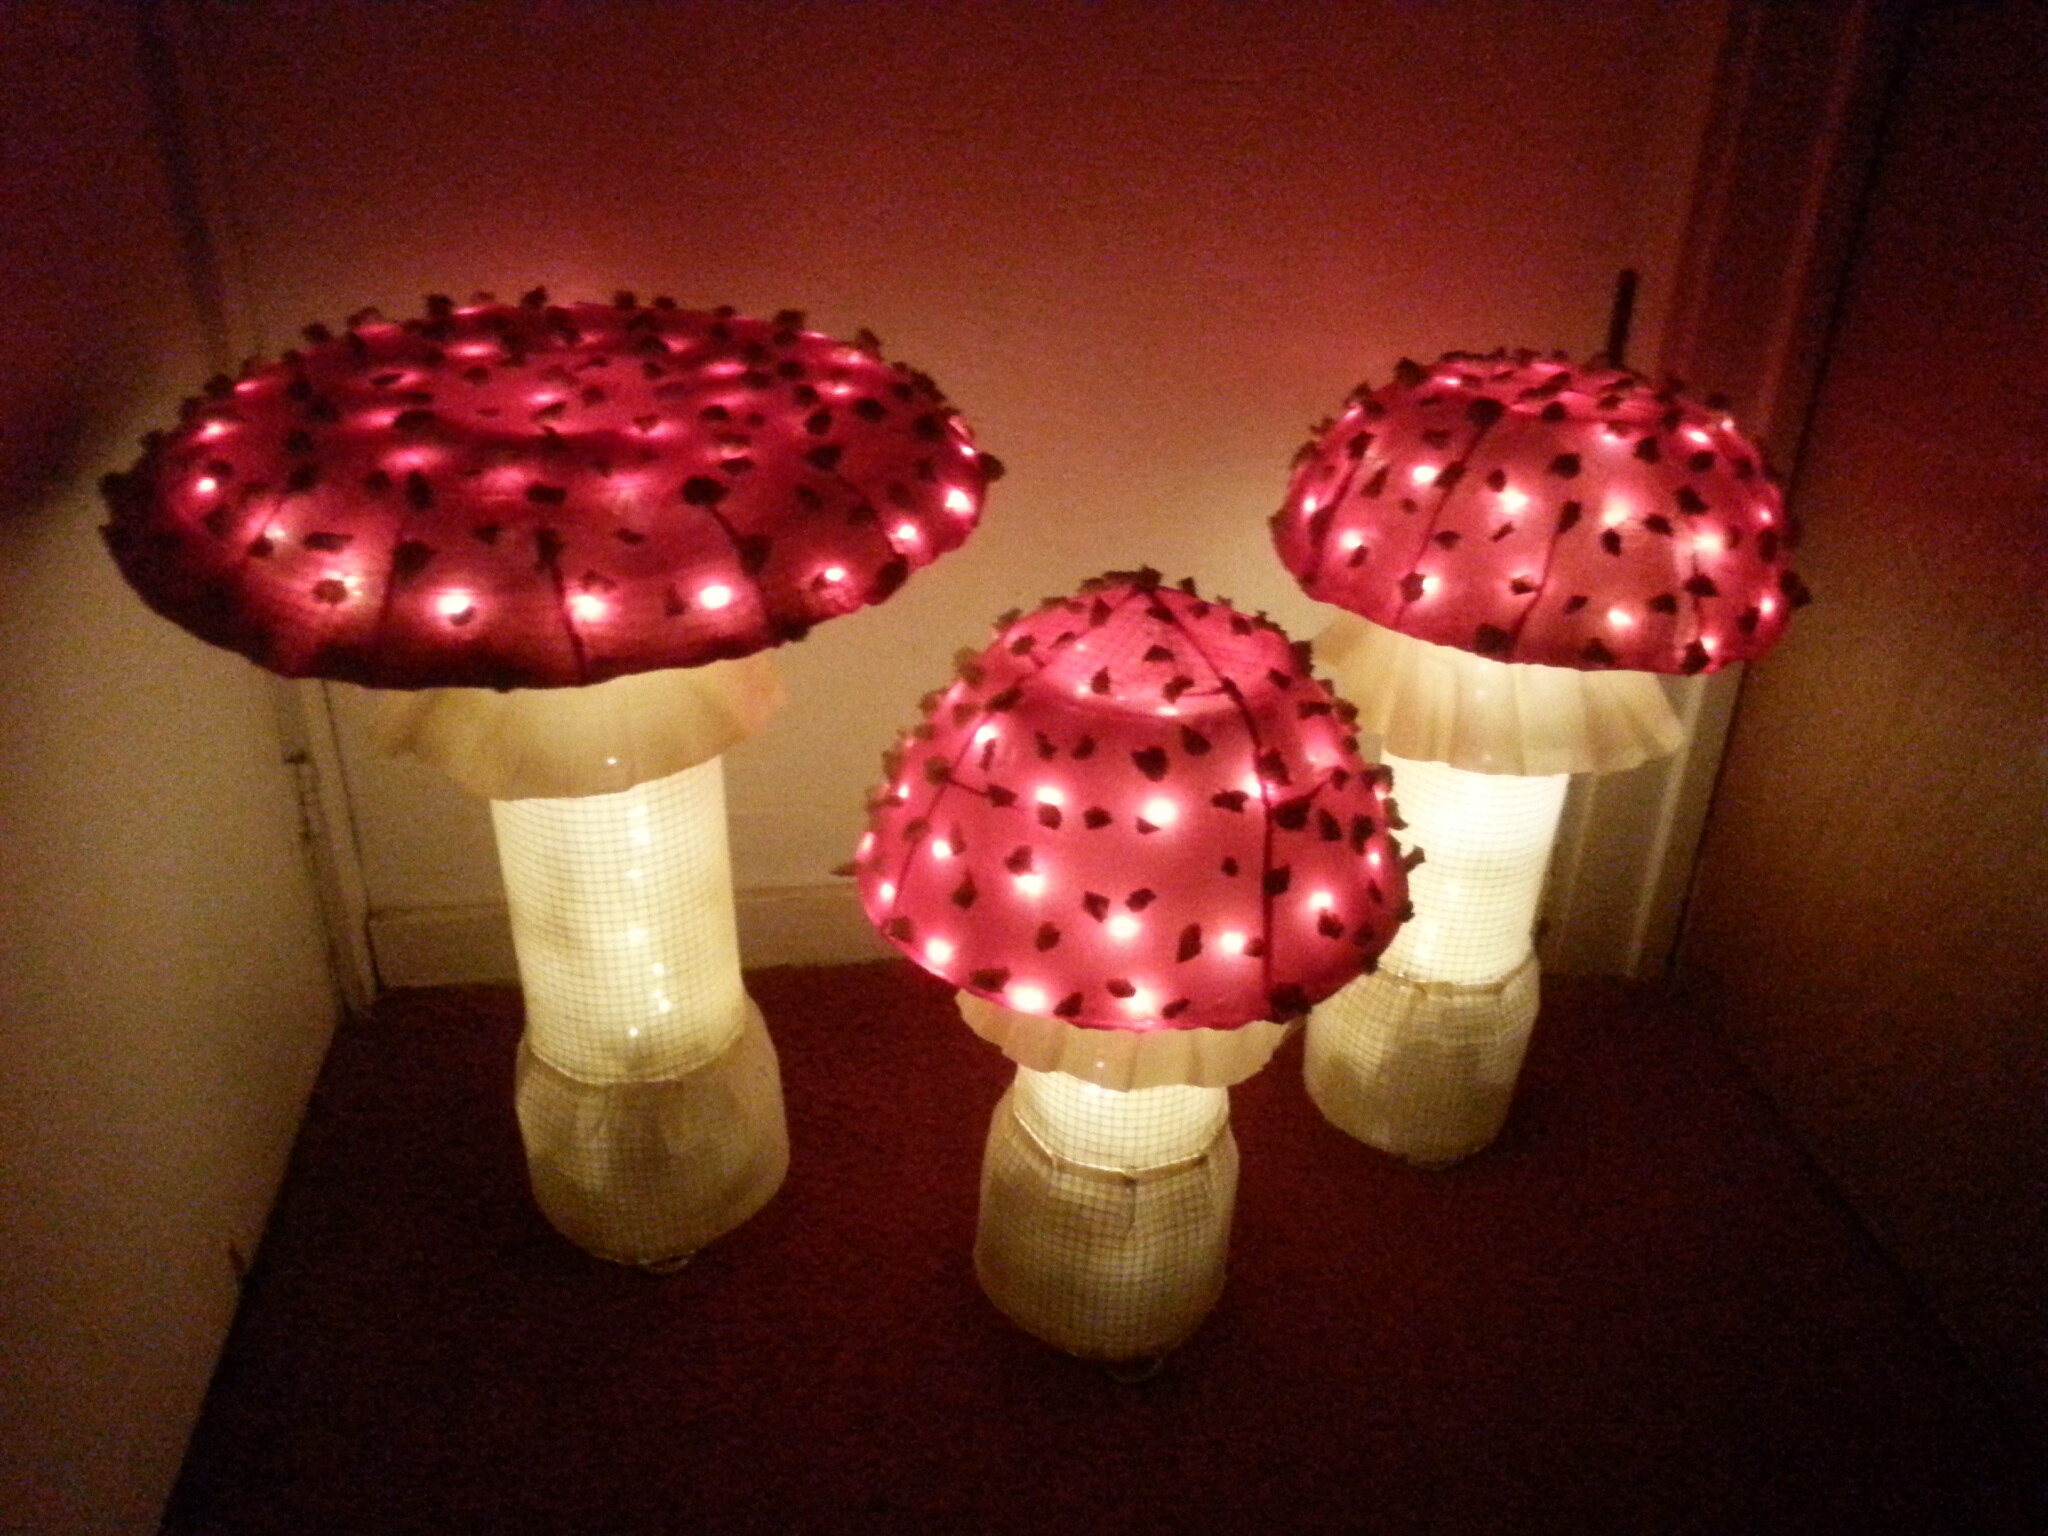
You – yes, YOU – are invited to build and display your very own giant, glowing mushroom! :smiley: Use our basic plans (below) or come up with your own; CFT will be sponsoring and building 6 of these luminous 'shrooms to start out, but we’ll need everyone’s help in order bring light to the furthest, darkest corners of the forest.

Where will these mushrooms be found? Ideally, everywhere, all around camp! Near your own camp, your mushroom is both art AND a glowing beacon for finding your way home at night. Or if you prefer, you can set your mushroom up in a more public space, maybe even as part of a mushroom garden with others if there’s enough interest. Just come find me at camp if you want help finding the perfect spot.

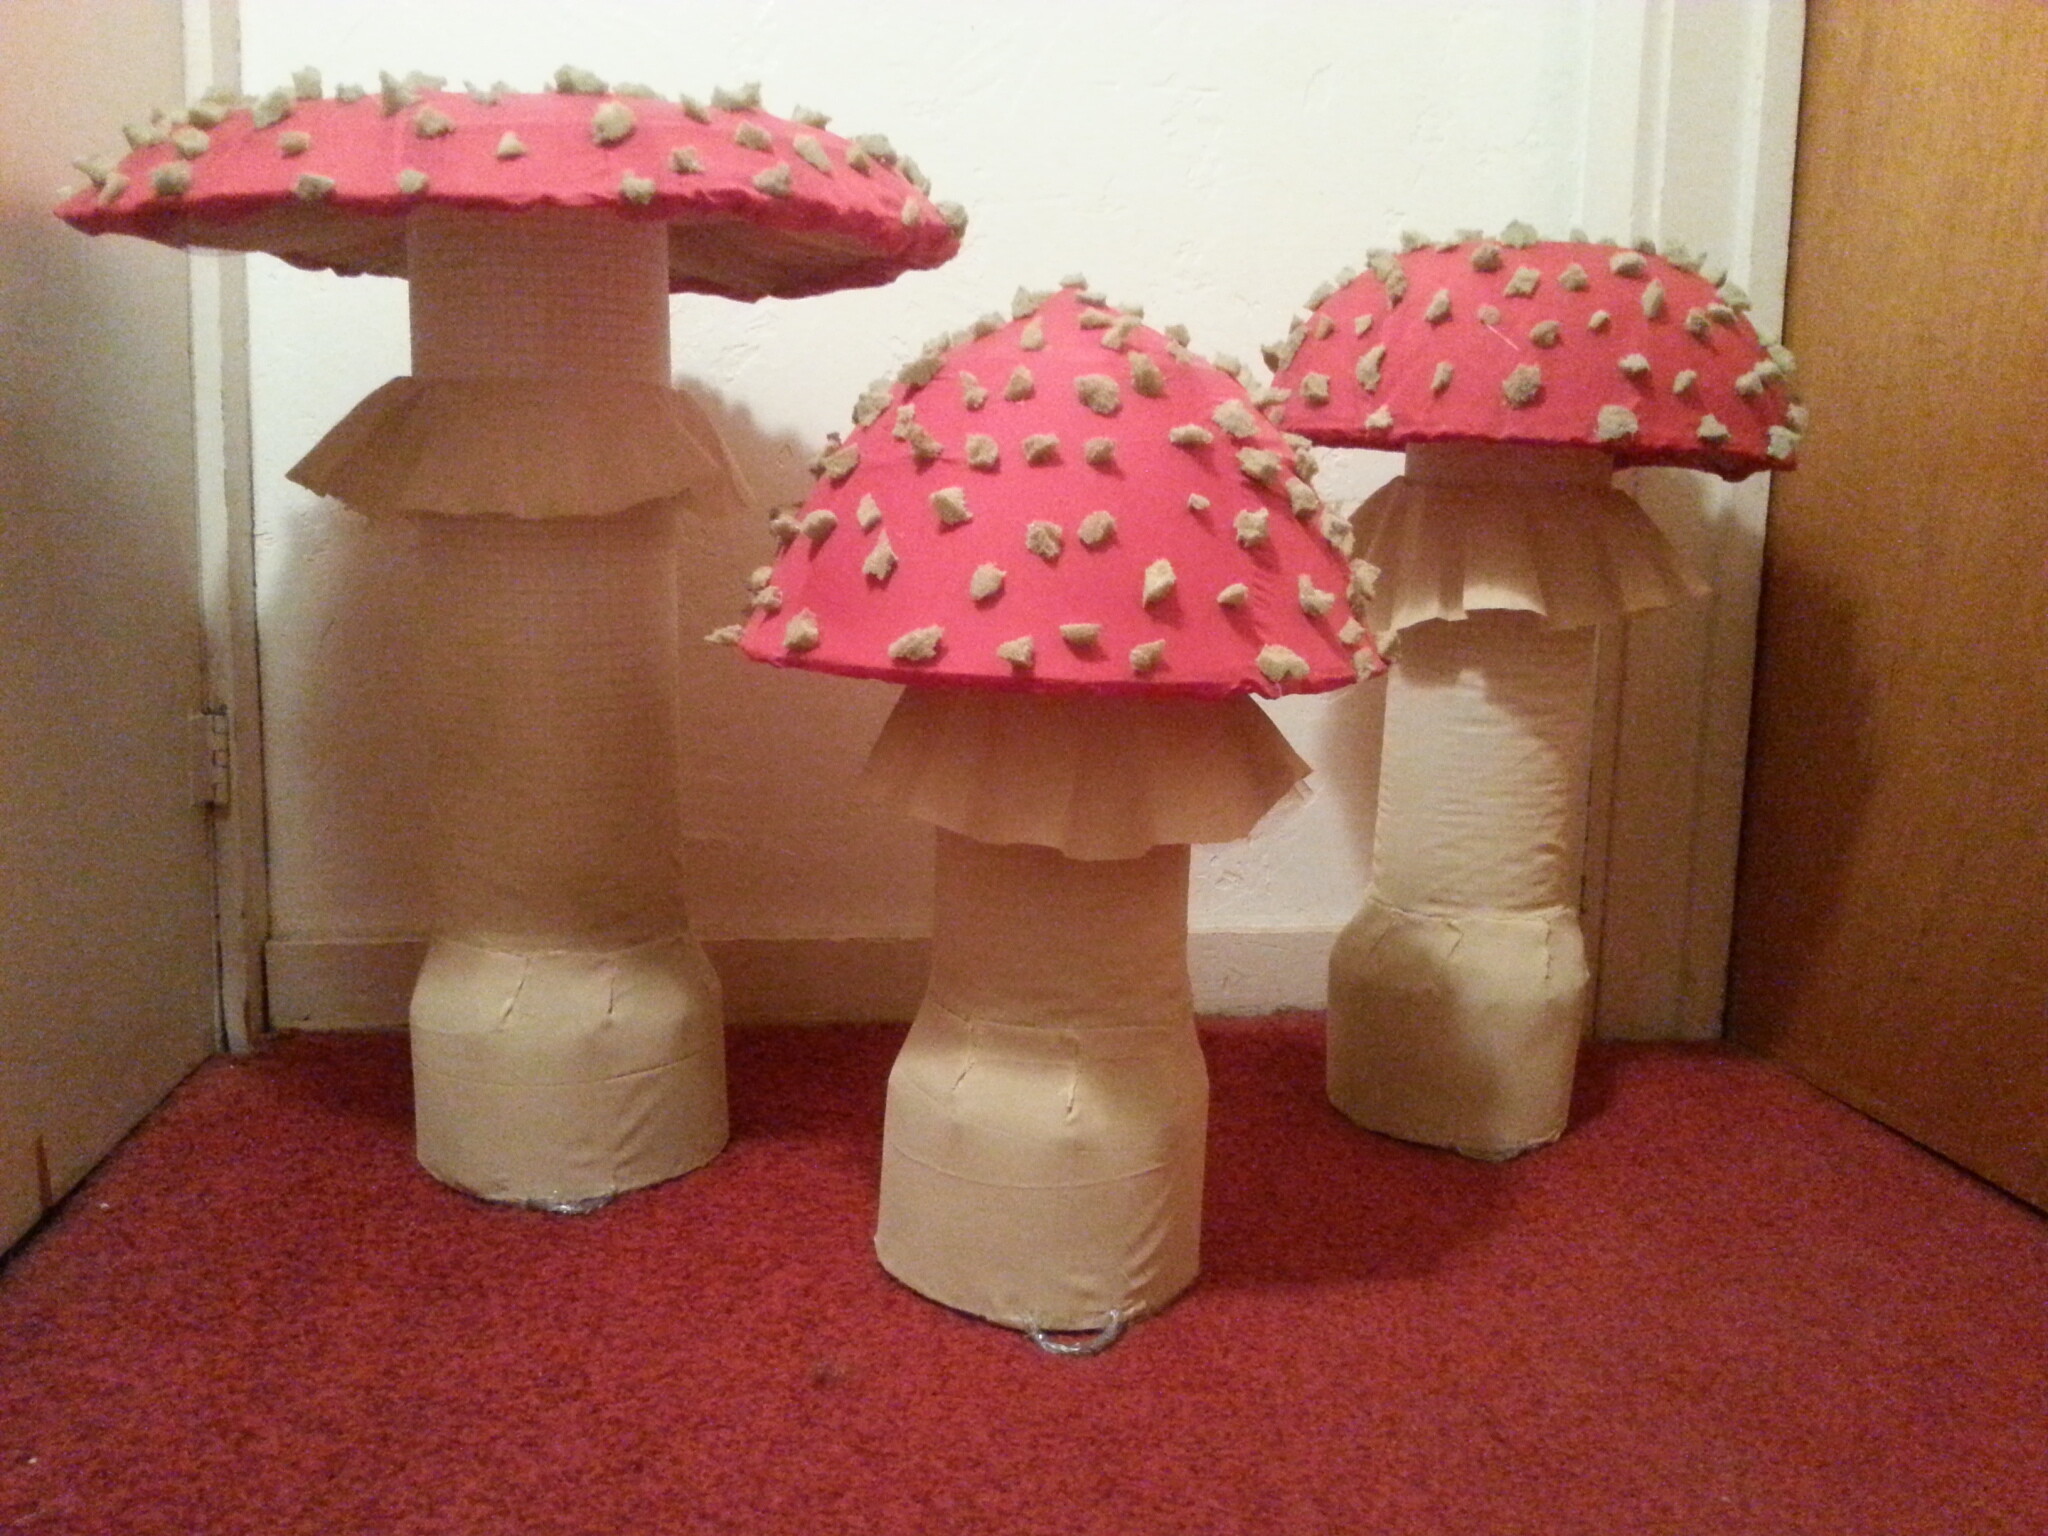
Below are the basic plans, but feel free to get as creative as you’d like with your own methods and materials! Try finding an unusual umbrella (colorful/ruffled/huge/tiny/clear/???), different types or colors of LED lights, and/or decorate with fun fabrics, paints, etc. to make your mushroom uniquely yours.

Materials for one mushroom will likely cost between $15-$30 using the following plans, or maybe less if you really shop around:
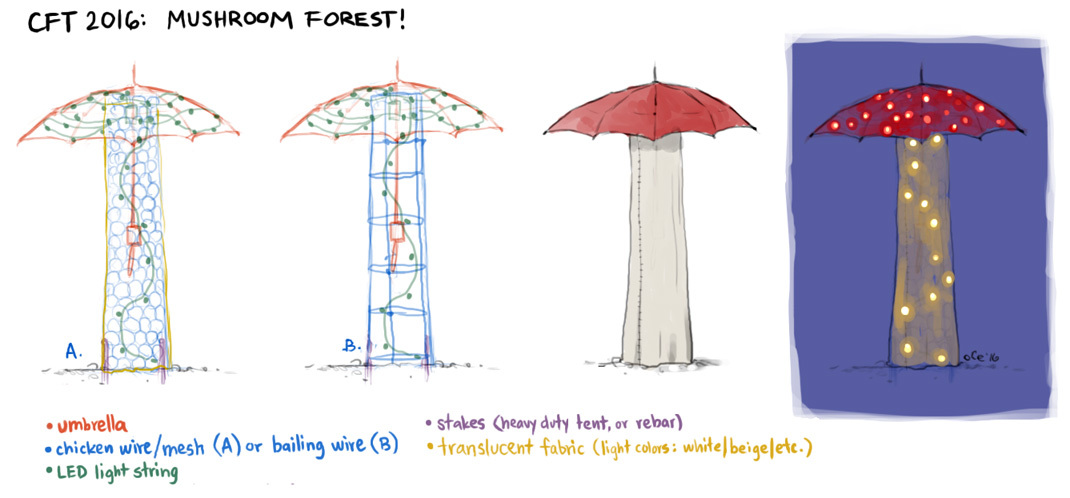
Materials:
-umbrella or parasol (any material EXCEPT paper, which is too fragile!)
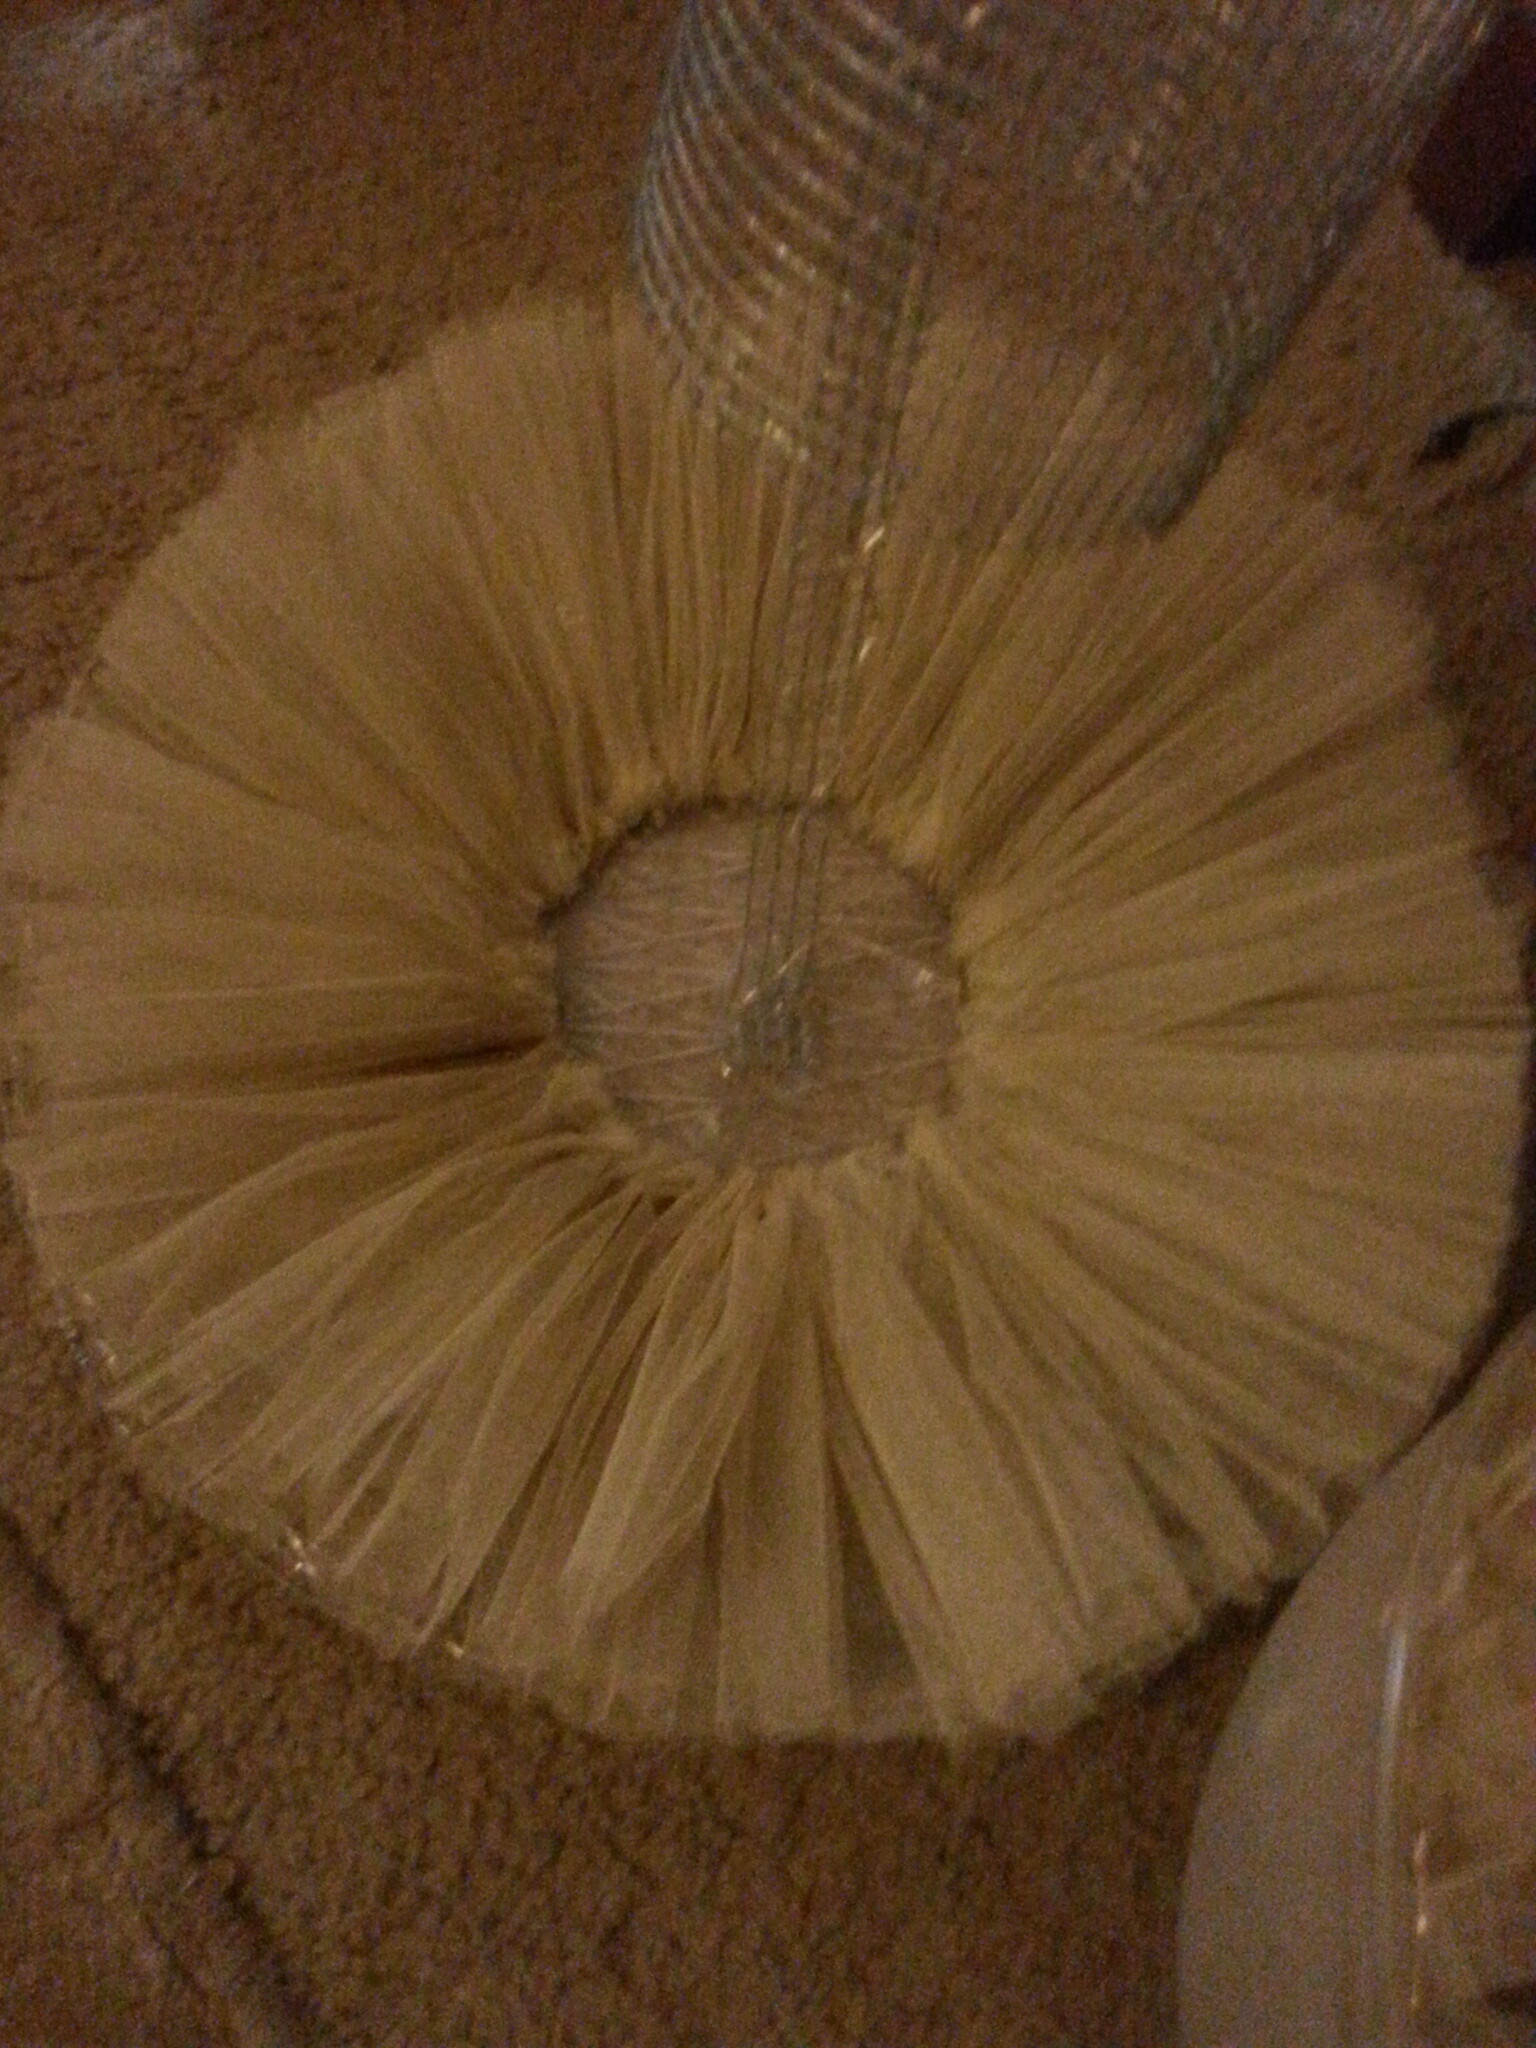
-1/2 to 1 yard translucent fabric, white OR light in color
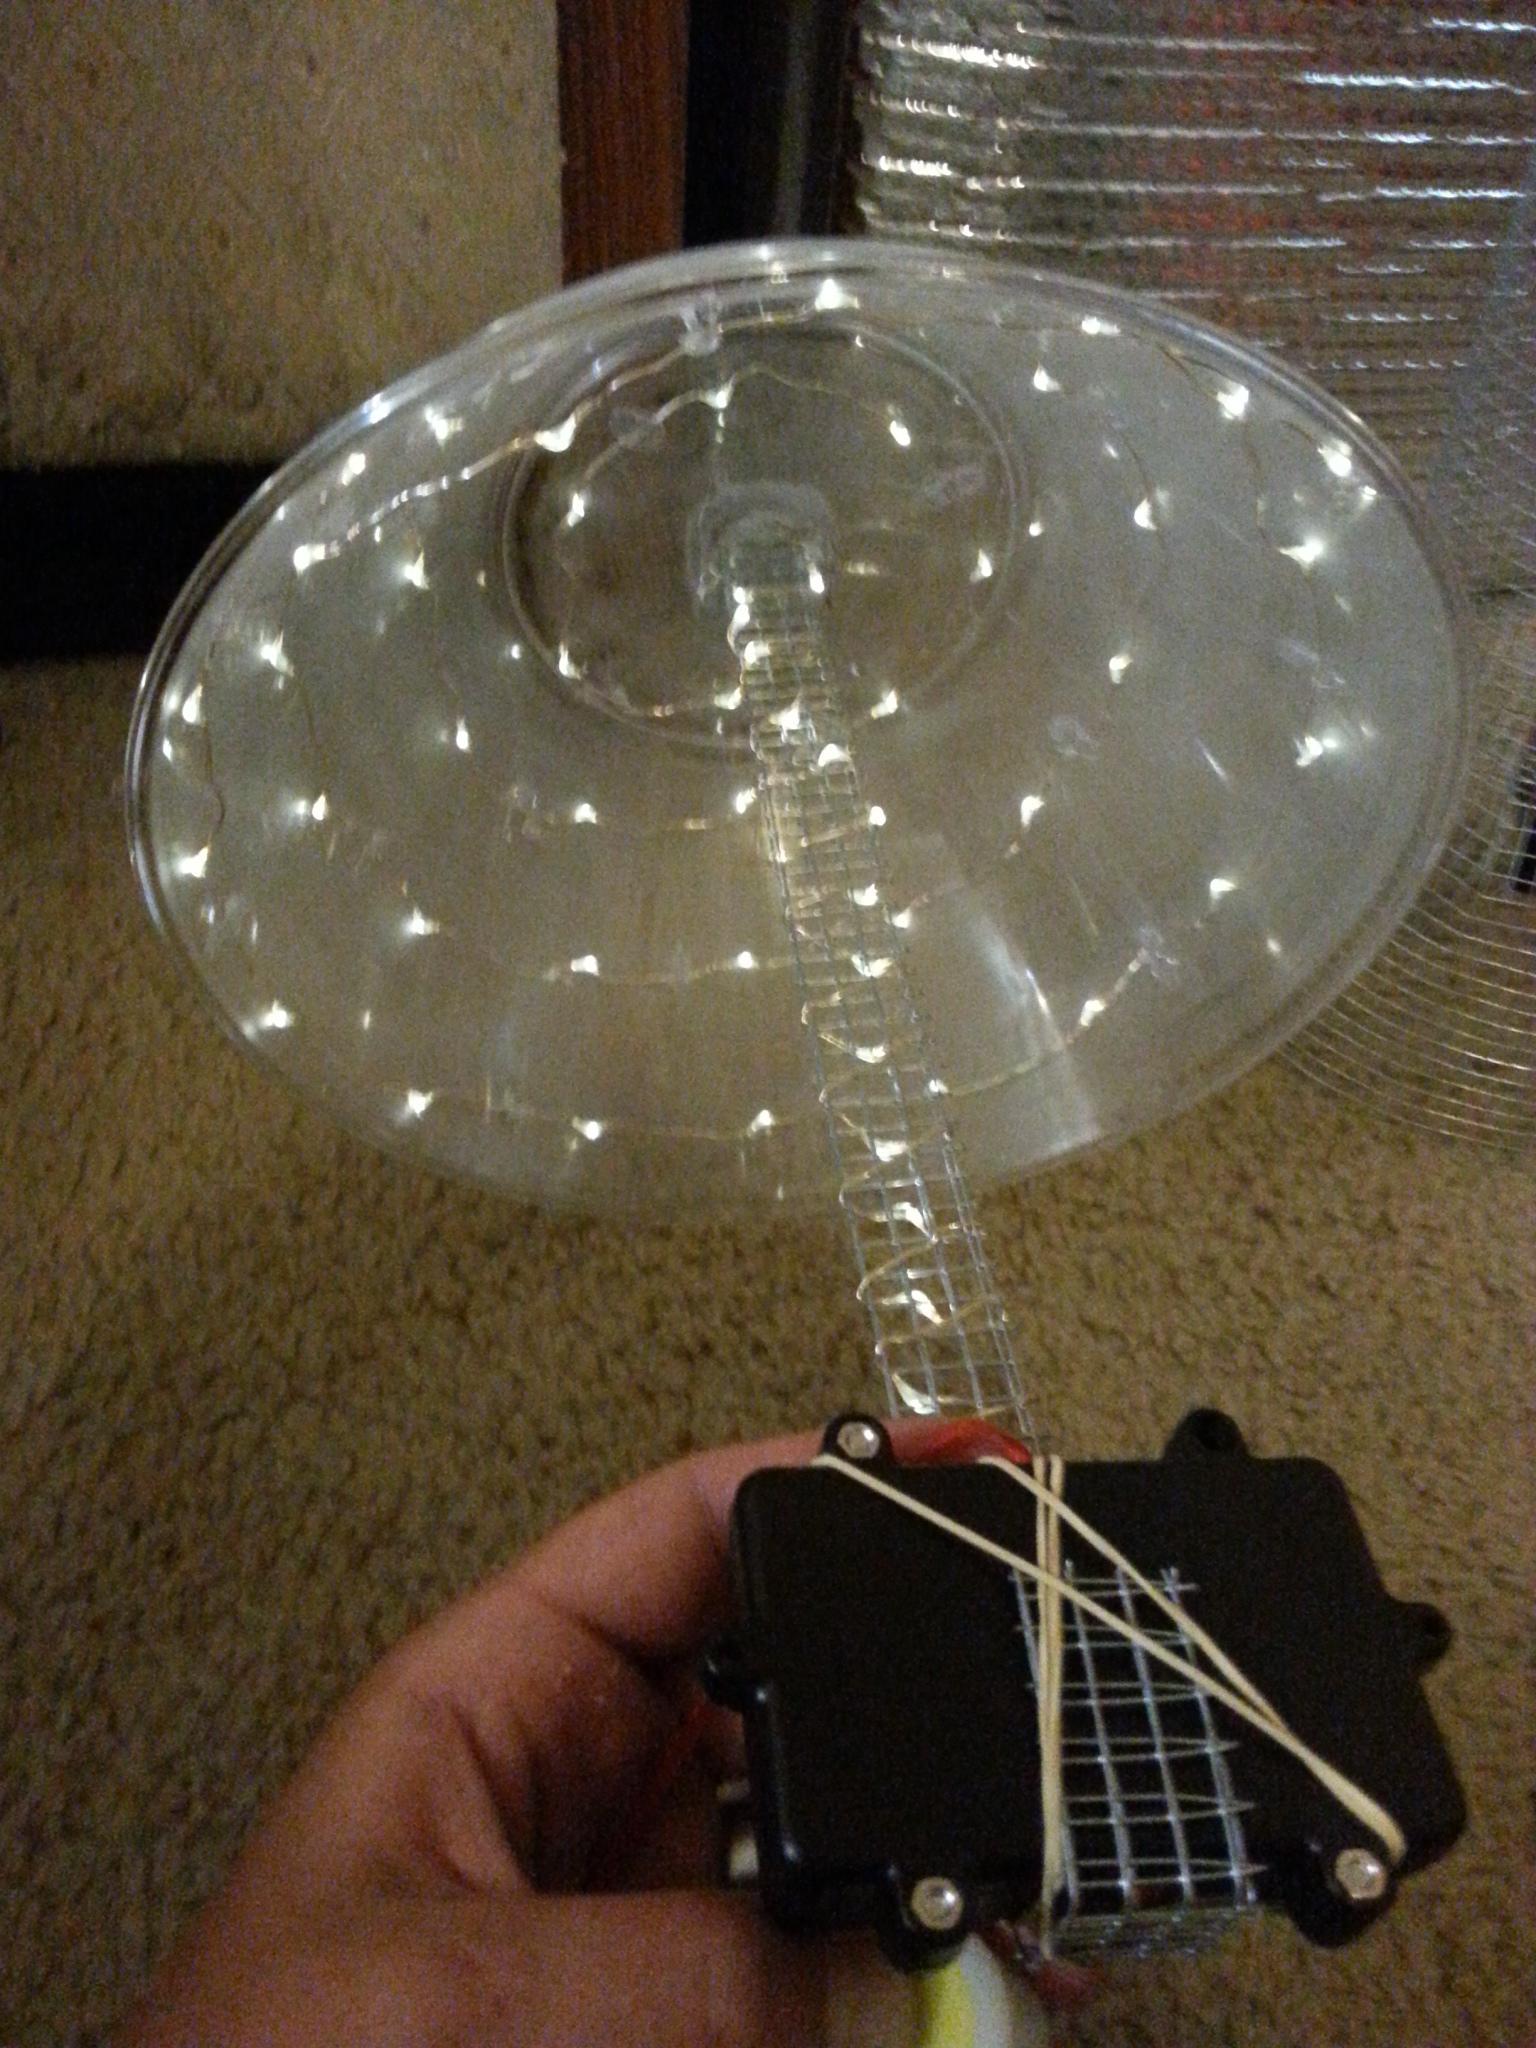
-warm OR cool white LED light string (battery operated, 30+ LEDs)
-chicken wire (mesh) or baling wire (wrapped)
-ties of some sort: cord, wire, zipties
-large ground stakes
-duct tape

*Other Tools/Supplies:
-wire cutter
-scissors
-extra batteries
-sewing needle & thread
-mallet
-needle-nosed pliers (optional, but very useful if shaping baling wire)

I will be editing this post soon to add more detailed instructions, plus links for where to you can order the materials online… but in the mean time, feel free to ask questions or share your ideas here. And tell your friends, because when it comes to glowy things more is ALWAYS better. :slight_smile:

2 Likes

I wonder if you could do this but use a tomato cage for the cylinder base part

Absolutely, a tomato cage would probably work great! :smiley: The bale wire version is essentialy just making a custom-size/shape tomato cage anyway.

IT BEGINS… :sunglasses:

(Note that we were originally planning to use red, green and blue umbrellas for the CFT-sponsored 'shrooms… but I just received this donation of white umbrellas for FREE(!), so I’ll be using dyes/paints to color these instead!)

Check back here soon – I will be posting detailed instructions, plus more pics of the process, once the construction is underway. :slight_smile:

I’ll build one. Thinking of using white fabric and parasol with fluorescent paints and some UV LEDs to light it

1 Like

Some what of a ‘walk through’ of how I made my version mushrooms for this awesome Mushroom Forest: Collective Art Project for 2016!: A picture of what I was going for.

I bought some dollar store and thrift store plastic bowls and a plate- out of mesh wire I made the bases and used 22 gauge? wire to wrap the ends together tightly. Added a some what bulbous bottom to the stems. Hot glued battery powered string lights to the bowls and plate- also hot glued a middle mesh wire support piece holding the battery pack. Rubber bands for easy removable access to the battery pack.A ‘close-up’ of the set up. I spray painted the tulle to match the stem base color beige. (fun little bit: you can spray paint white-ish colored tulle or lace to match it to a project you are working on!) Sewed the tulle- to give it a bunched up look. I then hot glued it to the plate- Then did the same for the other two bowls.(I made sure that the inner ring of tulle would allow the top of the stem to sit perfectly under the bowls and plate. This is so the ‘caps’ do not move- and the ‘caps’ are removeable so I can turn the lights on/off as well as change the batteries if need.:grin: ) I then made paterns and sewed the red fabric to fit the forms of the bowls and plate- then at the edges connecting to the tulle I rolled the edges over for a ‘clean look’ and hot glued the edges of the red fabric over the tulle. Getting there! I then took the 22 gauge? wire and wrapped some loops to stake it down so wind does not blow them over. (I covered the loops in hot glue to improve the longevity of the wire.) I then took a used old flexible plastic cutting board and cut it to fit the bottom of the stem- I then hot glued it to the bottom of the stem to help with water proofing. I carefully ripped tiny random pieces of green foam- I then used an adhesive spray to try and keep the pieces of foam on a cut open paper bag in order to spray paint them to match the bottom fabric color. I then hot glued each piece on the top part of the red caps randomly. I cut some of the beige fabric and hot glued it to the stems to mimic the rings/skirts under the mushrooms caps from after opening up from their younger stage. (I also sprayed a water proofing spray to help protect it some more!) ‘Daylight’ finished photo. ‘Night time’ finished photos. Hope you all are having as much fun as I had making mushrooms for the Art Project! :grinning: I can not wait to see all the mushrooms out there!! Happy arting!

3 Likes

Come join in on the fun and make a mushroom or more!

Were these set up at camp somewhere I missed? I saw the little mushrooms but never the big ones.

Mine were set up near Blood Wood camp. :slight_smile:

I unfortunately didn’t have time to make one of these, but I did make a bunch of 3D printed glowey mini-mushrooms and put them in the center of blue camp. :slight_smile:

I loved your little mushrooms! They were so cute and did very much resemble the real thing.

I sadly ran out of time to make mine too X_X

This was a great idea :slight_smile: Sadly I ate the mushrooms so had none to display.

At BITF, there was simon says giant mushrooms.

Hey, those were cute! Didn’t realize they were printed, tho - good job!

Thank you so much! I am glad you enjoyed them! :slight_smile:

Sadly no, the mushrooms did not get set up as planned… :\ Several Major Fiascos happened (includng a misprinted 1st batch of t-shirts) that took away all my time and energy for the entire week before CFT. I had to drop several lower-priority things, including these, out of necessity just to make sure the higher-priority ones happened. ;( I apologize to everyone who looked for them but couldn’t find them!

THAT SAID… next year! I don’t see any reason why we can’t just set them up next year. :slight_smile: Got all the materials already, and even the super hasty prototypes looked awesome, so it would really be a shame not to! While, yes, they would have gone especially well with this year’s theme, IMO glowy 'shrooms are always on point regardless of theme… :wink:

This also gives the rest of you an entire year to plan, build and bring your own mushrooms to contribute to the cause… hint, hint!

@Pe_Low I know I’ve told you this already, but your mushrooms were totally fabulous! Thank you for finishing them and getting them up in your camp, and for posting a photo tutorial here. <3

@moka Oh gosh, I don’t think I saw these!! I didn’t really have a reason to go over to Blue Camp after dark, I guess. :slight_smile: If you got any pictures, I would love to see what they looked like!

@groggy Running Out Of Time was this year’s alt theme, it seems. ;D Again, there’s always next year.

I saw yours! They were hella cute.

No worries! Very understandable and I can not wait to see them next year. I will bring mine again next year! Thank you!

agree! there was one right next to a friend of mine’s tent and i really enjoyed it <3